
The winning student onboarding checklist runs on a 0 to 100 day sequence that blends automated pre-visit and milestone messages with coach-led personal touches. The six most urgent moves: collect the digital waiver and payment before the first class, send a welcome pack, greet and tour the student on arrival, schedule the first two weeks of classes like fixed appointments, run a 2-week progress check, and fire a milestone celebration or referral ask on the first stripe or the eighth visit. A dedicated martial arts management platform can automate most of the timing so your coaches only step in for the calls that matter.
TL;DR:
- Automate collection of digital waivers and payments before the first class to eliminate delays and allow staff to focus on personal greetings.
- Treat the first month as a series of scheduled appointments, with around eight classes to boost long-term retention and early attendance habits.
- Trigger milestone celebrations, like belt or stripe achievements, immediately to maximize referral and loyalty opportunities when motivation peaks.
- Use automated messaging for reminders, progress checks, and at-risk signals, but include personal coach interactions for key milestones and follow-ups.
- Implement a staged onboarding process that covers pre-arrival, first visit, early engagement, and milestone moments, supported by a management system like DojoTrack.
Table of Contents
- What Belongs on Your Student Onboarding Checklist?
- The Onboarding Timeline: From Signup to Day 100
- What Systems You Need Before Day One
- Which Retention Triggers Deserve Automation?
- How Should You Talk to New Students Each Week?
- Orienting New Students to Your Facility
- Connecting New Students to Coaching and Support
- Setting Up Technology Access on Day One
- Getting Policy Acknowledgments Signed Correctly
- Do Buddy Programs Help New Students Stick?
- Covering Emergency Procedures Without Scaring Anyone Off
- What Running Schools Taught Us About Onboarding
- Put This Checklist on Autopilot With DojoTrack
- Sources
- FAQ
What Belongs on Your Student Onboarding Checklist?
A printable checklist works better than a memorized process because staff turnover, busy front desks, and distracted coaches all break memory-based systems. Group tasks by the moment they happen, assign an owner, and mark whether it should run on autopilot or require a human.
At signup (front desk, automate where possible):
- Collect digital waiver, emergency contact, and medical notes
- Set up billing and confirm trial or starter-package terms in writing
- Assign a primary coach and log preferred class times
Pre-arrival (automate):
- Send confirmation text with class time, location, and what to bring
- Deliver a digital welcome pack (schedule, dress code, parking, contact person)
- Send a 24-hour reminder before the first class
First visit (front desk + coach, manual):
- Greet by name and give a two-minute facility tour
- Coach engineers one small technical win before class ends
- Front desk books the next three classes before the student leaves
Weeks 1 to 4 (coach, mixed):
- Automate attendance confirmations and reminders
- Coach delivers verbal micro-feedback every session
- Run a 2-week progress check by phone or short video (manual)
Months 2 to 3 and milestones (admin + coach):
- Trigger a milestone message on first stripe or eighth visit (automate)
- Coach makes a personal note or call at the milestone (manual)
- Admin reviews membership status before the next belt test
The Onboarding Timeline: From Signup to Day 100
Onboarding works best as a staged journey, not a single event. Staged onboarding frameworks move a student through pre-arrival, first impression, early engagement, habit formation, and eventually community and identity, and each stage needs different tools.
- Pre-arrival. Confirm the booking, collect the waiver, and send a digital welcome pack that names who will greet the student. This step removes the single biggest source of first-visit anxiety: not knowing what to expect.
- First visit. Greet the student by name, give a short tour, and structure the class so they leave with one clear technical win. Engineering a small success experience early creates the kind of positive feedback loop that brings people back for class two. Hold the membership conversation after class, once the student has had a moment to process how it felt, not while they’re still catching their breath.
- Weeks 1 through 4. Treat every early class like a scheduled appointment rather than an open invitation. Confirming those appointments measurably cuts no-shows and starts building the attendance habit early. Layer in quick verbal feedback (more on the GSR method below) after every session, then run a formal 2-week check-in to reset expectations and lock in the next set of bookings. Students who attend roughly eight classes in their first month are far more likely to stick around long-term, so that four-week stretch deserves more attention than any other single phase.
- Days 30 through 100. This is where most schools lose students they thought were safe. Pre-frame the idea that motivation dips are normal, plan a milestone celebration around the first stripe or belt, and push the renewal or membership-close conversation to happen before that first belt test, not after. Locking in commitment ahead of the milestone means the celebration reinforces a decision already made instead of trying to talk someone into one.
What Systems You Need Before Day One
A checklist only works if the data behind it is captured consistently. Build your signup form to collect contact information, medical notes, a parent or guardian record for minors, and the student’s preferred coach or class time, so that first interaction feels personal rather than administrative.
Collect the digital waiver and online payment before the student’s first class, not during it. This single change removes the awkward pause at the front desk and lets your team focus entirely on the greeting and tour instead of paperwork.
Attendance check-ins and belt or rank fields are what make milestone automation possible later. If your attendance tracking system doesn’t yet capture belt rank, visit counts work as a reliable substitute trigger.
Scheduling needs its own rule: treat every class in the first month as a booked appointment, complete with automated confirmation and a 24-hour reminder. And keep billing terms explicit from day one. State exactly what the trial or starter package includes, when it ends, and what happens next, then automate the receipts so nothing gets lost in a text thread.
Pro Tip: Write your trial-to-membership terms in plain language on the welcome pack itself, not just in a separate contract. Students who know exactly when a decision point is coming are far less likely to feel blind sided by a sales conversation.
Which Retention Triggers Deserve Automation?
Not every touchpoint needs a human, but the ones that do need to happen fast and feel personal. Milestone moments and at-risk signals are the two triggers worth building around first.
- First stripe or belt: fire a congratulations message, a referral invite, and an optional gift offer, then have the coach add a short personal note.
- Eighth visit: treat this as an informal loyalty milestone even without a belt change, since early visit frequency tracks closely with long-term retention.
- No check-in for 7 days: trigger an automated SMS nudge before it becomes a pattern.
- Fewer than 6 visits by day 45: escalate from automated text to a coach video or phone call.
Milestone celebrations produce the highest-leverage referral moments a school gets, because pride peaks right at the belt or stripe ceremony and fades fast afterward. Ask for the referral in that window, not a week later. Surprise welcome gifts work the same way. The value comes from the surprise, so keep it out of your printed welcome materials and let a coach hand it over unannounced. Feed coaches a short note on where each student stands (visit count, last feedback, any flagged concern) so a manual outreach call takes thirty seconds to prep instead of ten minutes.
How Should You Talk to New Students Each Week?
Match the channel to the message: SMS for reminders, email for receipts and documents, and a short personal video or call for anything that needs a human tone.
- Signup: automated welcome message confirming enrollment and first class time.
- 24 hours before class: automated reminder text.
- Within 24 hours after class: personal thank-you, ideally referencing something specific from that session.
- Two weeks in: a real check-in call or video, not a text.
- Six weeks in: a renewal conversation framed around progress, not price.
Close every in-person interaction with what trainers call the GSR formula: Give a specific compliment, Suggest one small improvement, Reserve the next class on the spot. “Your footwork on that last drill looked sharp, work on keeping your guard up next time, and I’ve got you down for Thursday at 6.” That single sentence does more for retention than any automated sequence alone, since pairing automation with a real instructor touch around visit four to six consistently outperforms automation by itself.
Orienting New Students to Your Facility
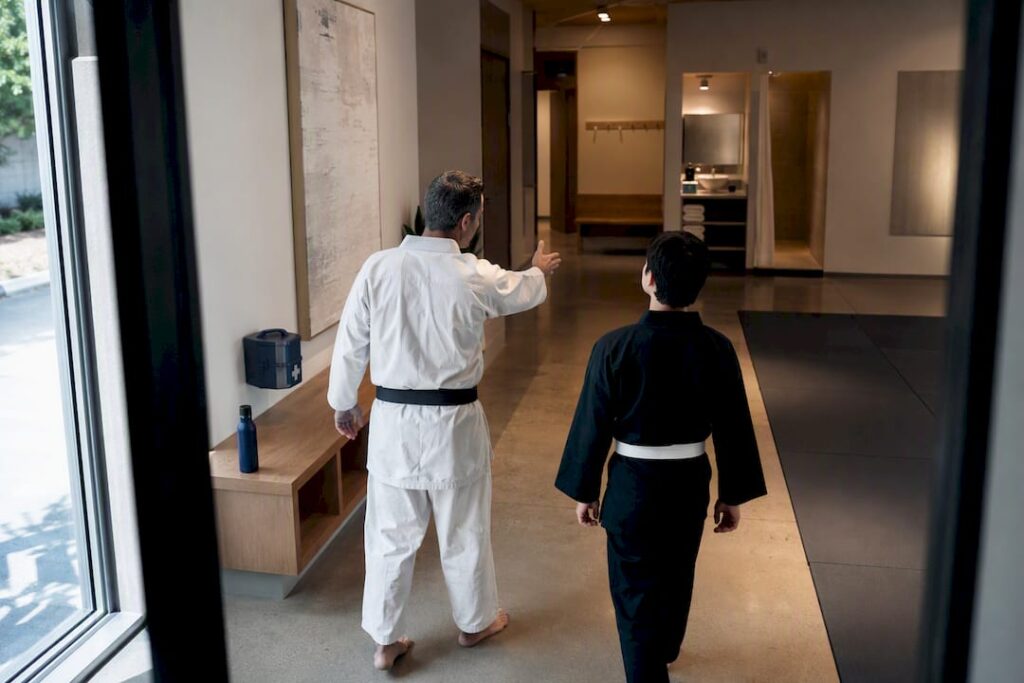
A tour on day one only sticks if you point out the things a new student will actually need in week two. Walk them past the changing rooms, water station, and equipment storage, but spend real time on anything tied to comfort or safety: where the first-aid kit lives, who to ask if they forget their belt, and where parents or guests can sit during class.
For schools that share space with a larger fitness center or run a lounge area, treat that walk-through as its own checklist item, not an afterthought squeezed into the greeting. Students who know where things are before they need them feel less like guests and more like members, and that shift in feeling happens faster than most owners expect.
If your school partners with outside resources, physical therapists, nutrition coaches, or a sports medicine clinic, mention that during the tour rather than burying it in a handout nobody reads. A student who pulls a muscle in week three and already knows who to call is a student who comes back in week four instead of quietly disappearing.
Keep this part of the checklist short. The goal isn’t a comprehensive facilities briefing. It’s making sure a student never has to wonder where something is or who to ask, because that small friction adds up faster than most schools realize.
Connecting New Students to Coaching and Support
New students rarely ask for help directly, even when they need it. Build a specific moment into the first month where a coach checks in on goals, not just technique, and points the student toward whatever additional support your school offers.
That might mean flagging a student for one-on-one instruction if they’re struggling with a specific movement, pointing a competitive-minded student toward your team or advanced class track, or simply making sure every new adult student knows who to ask about nutrition or cross-training questions. Assign this to the coach who ran the 2-week progress check, since that conversation already covers similar ground.
For kids’ programs, this is also where you connect parents to the right contact for questions about testing schedules, tournament participation, or leadership programs your school runs. Parents who know who to ask, and get a fast answer, stay enrolled longer than parents left guessing.
Document who a student’s “go-to” coach is for these conversations, and make that name visible in your system so front desk staff can route a question correctly on the first try instead of passing a student around.
Setting Up Technology Access on Day One
Every new student needs working access to whatever digital tools your school runs on before their second class, not their fifth. That includes login credentials for your member portal, the mobile app if you offer one, and any class-booking system they’ll use to reserve future sessions.
Walk students through the app during their first visit rather than emailing a link and hoping. A progress tracking system that shows belt curriculum, upcoming classes, and push notifications only helps retention if the student actually opens it. Five minutes of hands-on setup at the front desk, right after the waiver, solves more login problems than any follow-up email ever will.
For parents of younger students, set up their own account access separately so they can see attendance, upcoming tests, and billing without needing their child’s login. This single step cuts down on a huge share of the “when’s the next belt test” questions your front desk fields every week.
Confirm notification settings are on, not just installed. A student who downloaded the app but muted every alert gets zero benefit from your milestone messages and reminder texts, which defeats the purpose of building automation into your checklist in the first place.
Getting Policy Acknowledgments Signed Correctly
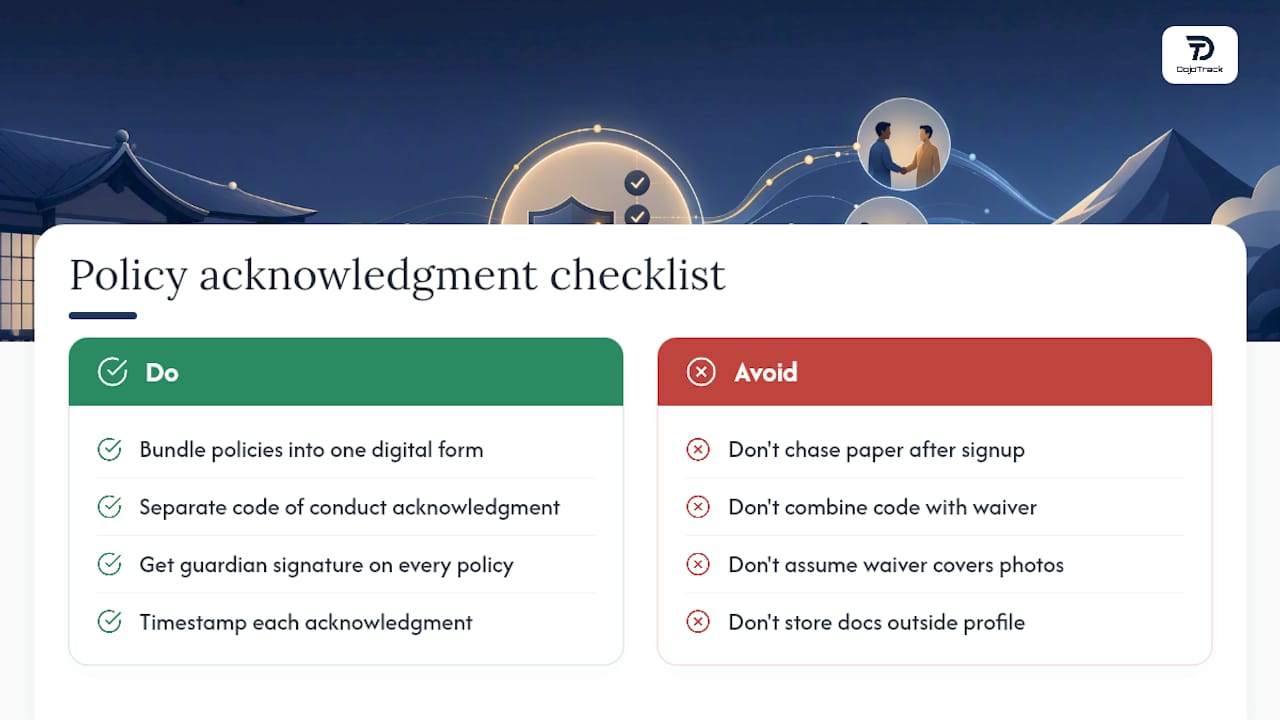
Waivers, codes of conduct, and privacy policies all need signatures before a student steps on the mat, and bundling them into one digital form at signup is far more reliable than chasing paper afterward. Include your code of conduct as its own acknowledgment, separate from the liability waiver, so students and parents actually read the behavior expectations instead of skimming past them to get to class.
For programs working with minors, get a parent or guardian signature on every policy document, not just the waiver, and store a timestamp with each acknowledgment in case a dispute comes up later. This matters more than most owners assume: a code-of-conduct acknowledgment signed and dated becomes your best protection if you ever need to enforce a behavior policy or handle a dismissal.
Privacy policy acknowledgment deserves its own line item too, especially if your school posts photos or videos of students on social media or a website. Ask permission explicitly at signup rather than assuming a general waiver covers it, and give parents a clear way to opt out without feeling like they’re causing a problem.
Keep every signed document tied to the student’s profile in whichever system runs your front desk, so a coach or admin can pull it up in seconds if a question ever comes up about what was agreed to and when.
Do Buddy Programs Help New Students Stick?
Pairing a new student with an experienced peer for the first few classes gives them a familiar face beyond the coach, and that second connection point often makes the difference between a student who feels like a visitor and one who feels like they belong.
Choose the buddy deliberately. Match a new adult student with someone close in age or fitness level, not just whoever happens to be in class that day. For kids’ classes, an older student a few belts ahead works well, since younger students often respond better to a peer role model than to another adult correction.
Keep the buddy’s job simple: introduce the new student to two or three regulars, sit with them during any post-class social time, and check in by text sometime in the first week. That’s a five-minute commitment that pays off in a student who shows up to class three feeling like they already know people.
Some schools formalize this with a small incentive, a free class credit or a spot on a “student ambassador” board, but the informal version works nearly as well if a coach simply assigns a buddy out loud during the first class rather than leaving it to chance. Add “assign buddy” as its own line on your first-visit checklist and this becomes a habit instead of an occasional nice gesture.
Covering Emergency Procedures Without Scaring Anyone Off
Every new student and every parent of a minor student needs to know where the exits are, where the first-aid kit is kept, and what happens if there’s an injury during class, but this conversation works better as a calm, matter-of-fact briefing than a formal safety lecture.
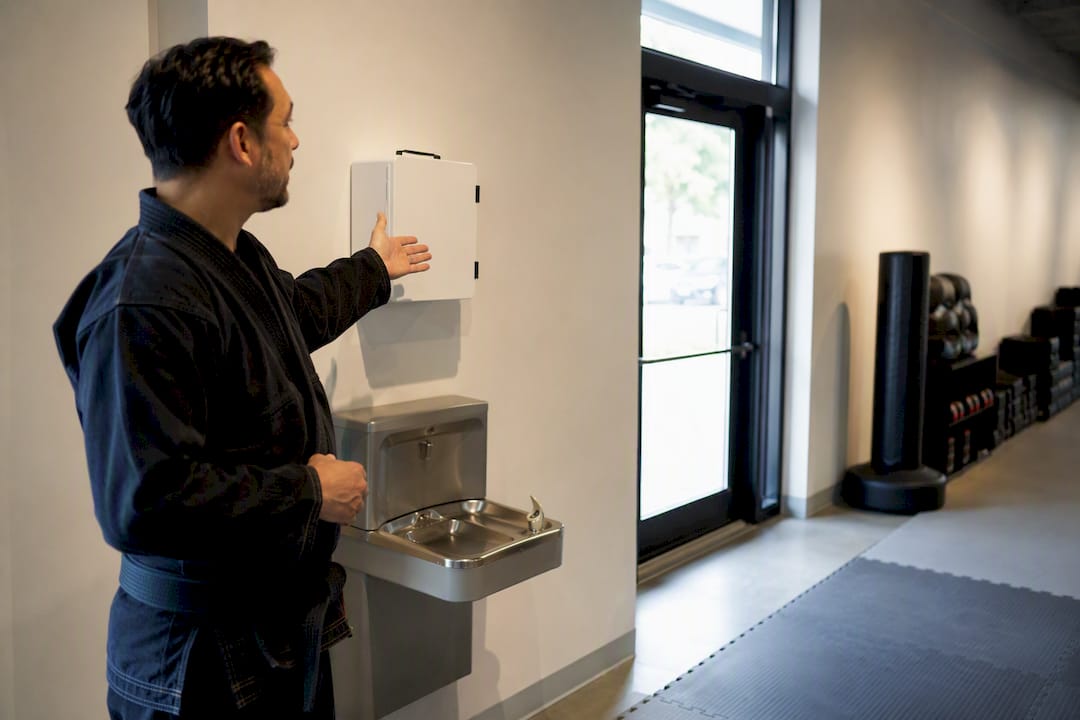
Fold it into the facility tour rather than treating it as a separate sit-down. Point out the first-aid kit, mention who on staff is trained in it, and note the nearest exit, all in the same breath as showing them where the water fountain is. Treating it as routine information, rather than a special announcement, keeps the tone appropriately low-key.
For contact sports and sparring-heavy programs, be explicit about your injury protocol before a student’s first sparring session, not after an incident. Explain what happens if something goes wrong, who makes the call on whether a student sits out, and how you’ll notify a parent or emergency contact. This is one of the few onboarding items where clarity matters more than brevity.
Keep emergency contact information current and easy to pull up fast. A signup form field is only useful if a coach can access it in seconds during an actual emergency, not buried three menus deep in a system nobody trained on. Review and confirm this information again at any renewal or milestone check-in, since phone numbers and emergency contacts change more often than schools expect.
What Running Schools Taught Us About Onboarding
DojoTrack founder Jared Reed built this platform after running martial arts schools himself, and the biggest failure mode he saw repeatedly was assuming a printed welcome folder equals understanding. Handing over paperwork isn’t onboarding. Neither is hoping someone notices a student stopped showing up.
Schools that fix this don’t need more staff. They need a small set of automated sequences, a welcome message, a reminder, a milestone trigger, so coaches can spend their attention on the two-week check-in call and the belt-test conversation instead of chasing logistics.
— DojoTrack
Put This Checklist on Autopilot With DojoTrack
Some martial arts management platforms are built to run the automated half of this checklist so your coaches can focus on the personal half. Welcome sequences, digital waivers, attendance capture, belt tracking, and milestone-triggered retention alerts can all live in one system, alongside a student mobile app that keeps members checking their progress between classes.
The free core platform covers student management, attendance, scheduling, and digital waivers out of the box, so a small school can start running this exact checklist without upfront cost, then unlock automated milestone messages and AI-driven retention alerts as the roster grows. If you’re ready to stop tracking stripes on a whiteboard and welcome packs in a group text, create your free account and set up your first automated sequence this week.
Sources
- A Seamless Onboarding Journey for New Students
- Student Retention: How to Win the First Four Months
- New member onboarding for martial arts (recipe)
FAQ
What Is a Student Onboarding Checklist for a Martial Arts School?
It’s a staged sequence of tasks, from waiver collection through milestone celebrations, that guides a new student from signup to long-term membership over roughly 100 days.
How Many Classes Should a New Student Attend in the First Month?
Aim for around eight classes in the first 30 days, since that early attendance level correlates strongly with students staying long-term.
When Should I Ask for a Referral?
Ask right at a milestone moment, like a first stripe or belt, when pride and motivation are highest, rather than waiting weeks for a generic campaign.
What Should I Automate First?
Start with waiver collection, class reminders, and milestone triggers. Tools like DojoTrack can handle these automatically while coaches focus on 2-week check-ins and renewal calls.
What Counts as an At-Risk Signal?
A student with no check-in for seven days, or fewer than six visits by day 45, should trigger an automated nudge followed by a personal coach call if there’s no response.