
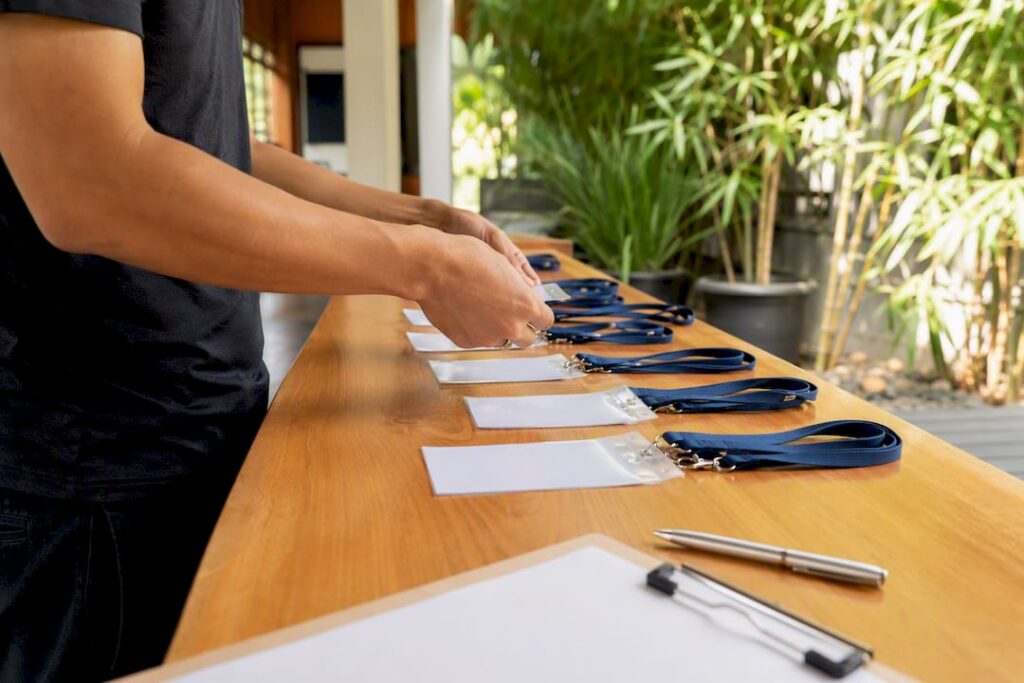
The most reliable seminar registration workflow runs through seven phases: requirements and data modeling, form build and UX, ticketing and payments, promotion and tracking, launch and monitoring, onsite check-in, and post-event reporting. Following this sequence in order, with a defined RACI and a multi-week runway, cuts form abandonment, keeps your CRM and billing data in sync, and prevents the check-in line from backing up out the door.
TL;DR:
- Building a comprehensive data model from stakeholder interviews ensures registration fields connect correctly to CRM, billing, and attendance systems, preventing cleanup later.
- Limiting registration form fields to essentials like name, email, and payment reduces dropout rates, with secondary information gathered afterward via email or follow-up forms.
- Supporting multiple payment methods, including invoices for corporate buyers and clear refund policies, streamlines ticketing without creating friction for different buyer types.
- Setting up tracking links for each promotional channel and monitoring funnel metrics weekly helps identify and fix points where registration drops or stalls.
- Using dedicated onsite hardware, testing check-in workflows in advance, and designing separate lanes prevents bottlenecks and ensures smooth attendee entry.
Table of Contents
- What Are the Seven Phases of a Seminar Registration Workflow?
- How Do You Plan the Pre-Launch Phase and Build Your Data Model?
- What Makes a Seminar Registration Form Convert Better?
- How Should You Structure Ticketing, Payments, and Refund Policies?
- How Do You Track and Optimize Registration Conversion?
- What Do You Need for Onsite Check-In and Badge Printing?
- How Do You Measure Success and Reduce No-Shows After the Event?
- How Does DojoTrack Streamline Registration for Studio Events?
- What I’ve Learned Watching Registration Workflows Succeed and Fail
- Try DojoTrack for Your Next Seminar Registration
- Sources
- FAQ
What Are the Seven Phases of a Seminar Registration Workflow?
Each phase in this workflow builds on the one before it, which is why skipping the data model to “just get the form live” almost always creates cleanup work later. Here’s the sequence, in the order that actually works:
- Requirements and data model (weeks 1 to 3). Interview stakeholders, decide what fields you need, and map each one to your CRM, billing, and attendance systems before any form is built.
- Form build and UX (weeks 3 to 5). Design a mobile-first registration form with the minimum required fields, owned by whoever manages your marketing tech stack.
- Ticketing and payments (weeks 4 to 6). Set pricing tiers, connect a payment processor, and publish refund policies, usually owned by operations or finance.
- Promotion and tracking (weeks 5 to 10). Launch UTM-tagged campaigns and monitor the registration funnel, typically owned by marketing.
- Launch and monitoring (ongoing from go-live). Watch signup velocity, fix broken links fast, and adjust capacity in real time.
- Onsite check-in (event day). Badge printing, QR scanning, and walk-in registration, run by your onsite operations lead.
- Post-event reporting (week following the event). Attendance analysis, no-show follow-up, and sponsor reports, owned by whoever requested the event.
Bizzabo’s research on building an event registration process backs this sequence, noting that mid-size conferences commonly run this exact structure across roughly 12 weeks. The seminar enrollment steps don’t have to take that long for a smaller workshop, but the order rarely changes even when the timeline compresses.
How Do You Plan the Pre-Launch Phase and Build Your Data Model?
Skipping requirements gathering is the single most common reason a seminar registration process falls apart in week 9. You end up with a form that collects data your billing system can’t read and a spreadsheet nobody trusts.
Start by interviewing four groups: your finance lead (what payment and invoicing data they need), your instructors or speakers (session capacity limits), your marketing team (what fields feed your CRM), and whoever runs the event day (what they need on a badge). Ask each one the same core question: “What breaks if this field is missing?”
From there, build a simple data model. Map every registration field to a destination — CRM contact record, billing record, or attendance log — before you touch form-building software. Use the attendee’s email or a unique registration ID as the primary key across every system, so a name change or a typo in one place doesn’t create a duplicate record somewhere else.
Here’s a sample multi-week timeline for a mid-size seminar:
- Weeks 1 to 2: Stakeholder interviews and requirements sign-off.
- Weeks 2 to 4: Data model built, fields mapped, ticketing tiers defined.
- Weeks 4 to 6: Form built and connected to payment processor and CRM.
- Weeks 6 to 7: Internal QA testing (see checklist below).
- Weeks 7 to 10: Promotion live, funnel monitored weekly.
- Weeks 10 to 11: Final capacity check, staff briefing, badge data export.
- Week 12 or event week: Launch, onsite check-in, post-event reporting.
Assign a RACI for each workflow component. Marketing is usually Responsible for the form and promotion; the event director is Accountable for the whole workflow; finance is Consulted on pricing and tax handling; and instructors are Informed of final headcounts. Nobody should be Accountable for the entire flow, then Responsible for setup, then also grabbing badges last minute because nobody assigned onsite ownership.
Before launch, run a QA checklist: test every payment method with a real (refundable) transaction, confirm the confirmation email fires with a working QR code, check that the form works on a phone with a spotty connection, and verify capacity limits actually stop registrations once a tier sells out.
Pro Tip: Run your QA test with someone who has never seen the form. Your team knows which fields matter; a stranger will find the confusing ones in under two minutes.
What Makes a Seminar Registration Form Convert Better?
Mobile-first design isn’t optional anymore. If your form breaks on a phone screen or takes 90 seconds to load images, you lose registrants before they ever see the ticket price. Registration best practices research points to a clear funnel: impression, landing page click, form start, completion. Every extra field you add is a chance for someone to abandon between form start and completion.
Require only what you truly need at checkout: name, email, and payment. Everything else, dietary preferences, session picks, T-shirt size, can wait for a post-registration email or a secondary form sent after payment clears. This is the same logic behind splitting essential fields from secondary information, and it’s the fastest lever you have for reducing drop-off in your attendee registration flow.
A few concrete rules that hold up across most seminar formats:
- Use conditional logic sparingly, and only to reveal fields that clearly depend on an earlier answer (a “company name” field that only appears after someone selects “corporate attendee”).
- Test the form on at least three device types and two browsers before launch.
- Send an immediate confirmation with a QR ticket and a calendar invite attached.
- Validate email addresses and check for existing records to block duplicate registrations before they enter your CRM.
Pro Tip: If you’re debating whether to include a field, cut it. You can always email registrants for missing information; you can’t get back the ones who abandoned the form on field eleven.
How Should You Structure Ticketing, Payments, and Refund Policies?
Your ticketing structure needs to serve two very different buyers: an individual paying with a card and a corporate training coordinator who needs a purchase order and a NET 30 invoice. Trying to force both through the same flow is where most seminar ticketing workflow friction starts.
Set up tiered pricing, early bird, standard, and group or VIP, with automated cutoffs based on date or seat count, so you’re not manually closing a pricing tier at midnight. Seat pools should transition automatically: when early bird sells out, the form should switch to standard pricing without anyone touching it.
- Support card payment for individuals and invoice or NET terms for corporate buyers who need approval cycles.
- Offer an offline payment option (check or wire) only if your event genuinely attracts buyers who need it, since it adds reconciliation work.
- Publish a clear refund and transfer policy on the registration page itself, not buried in a confirmation email footer.
- Automate refund enforcement where your payment processor allows it, so a request outside the window gets an automatic explanation instead of a manual back-and-forth.
- Let the payment platform handle PCI compliance rather than storing card data yourself; most modern ticketing tools already do this by default.
When corporate invoicing is allowed, add fields for company name, billing address, and PO number, but only show them when someone selects “corporate” as their registration type. That keeps the individual-buyer path short while still capturing what finance teams need for reconciliation.
How Do You Track and Optimize Registration Conversion?
Every promotional channel needs its own tracking link. Set up UTM parameters for email, social, partner newsletters, and paid ads separately, so when your registration count stalls at week 6, you can see exactly which channel stopped converting instead of guessing.
Monitor three funnel numbers weekly: landing page views, form starts, and completion rate. A completion rate that drops sharply between “form start” and “completion” almost always points to a field problem, not a promotion problem, which is a distinction that saves you from tweaking the wrong thing.
- Audit your landing page for load speed and mobile rendering before you spend a dollar promoting it.
- A/B test one element at a time, headline, CTA button color, or form length, and prioritize testing the mobile version first since most registrants will click from a phone.
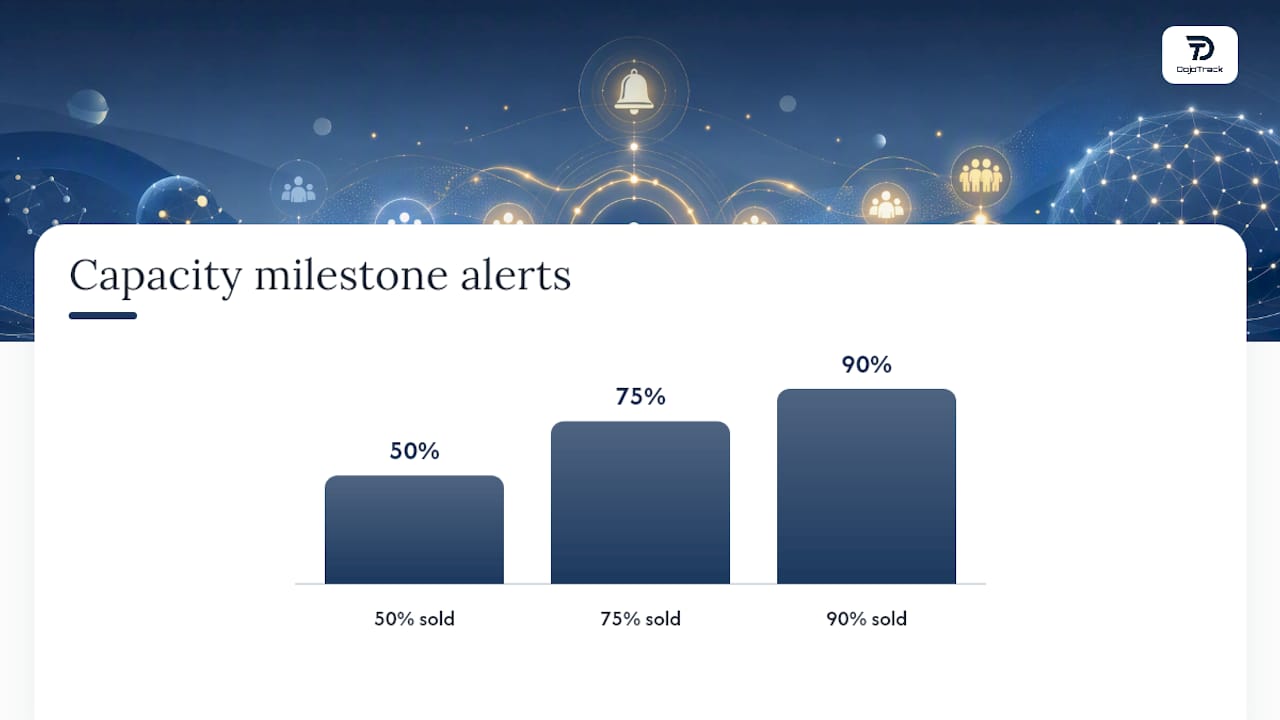
- Set capacity milestone alerts at 50%, 75%, and 90% sold, so your team isn’t caught off guard by a sudden sellout.
- Watch for sudden completion drops, which usually signal a broken payment integration or an expired promo code, not a loss of interest.
- Use early-bird deadlines honestly. Scarcity messaging works, but only extend a “final” deadline once. Attendees remember being burned by a fake countdown.
Vendors that build unified registration and check-in systems have found that fragmented tools cause the majority of onsite bottlenecks at large events, and the root cause traces back to promotion-stage data that never made it cleanly into the onsite system. Catching funnel problems early prevents that gap from widening.
What Do You Need for Onsite Check-In and Badge Printing?
Onsite readiness is where a clean registration workflow either pays off or falls apart in front of a line of impatient attendees. The fix isn’t more staff, it’s better lane design and hardware that’s been tested the day before, not the morning of.
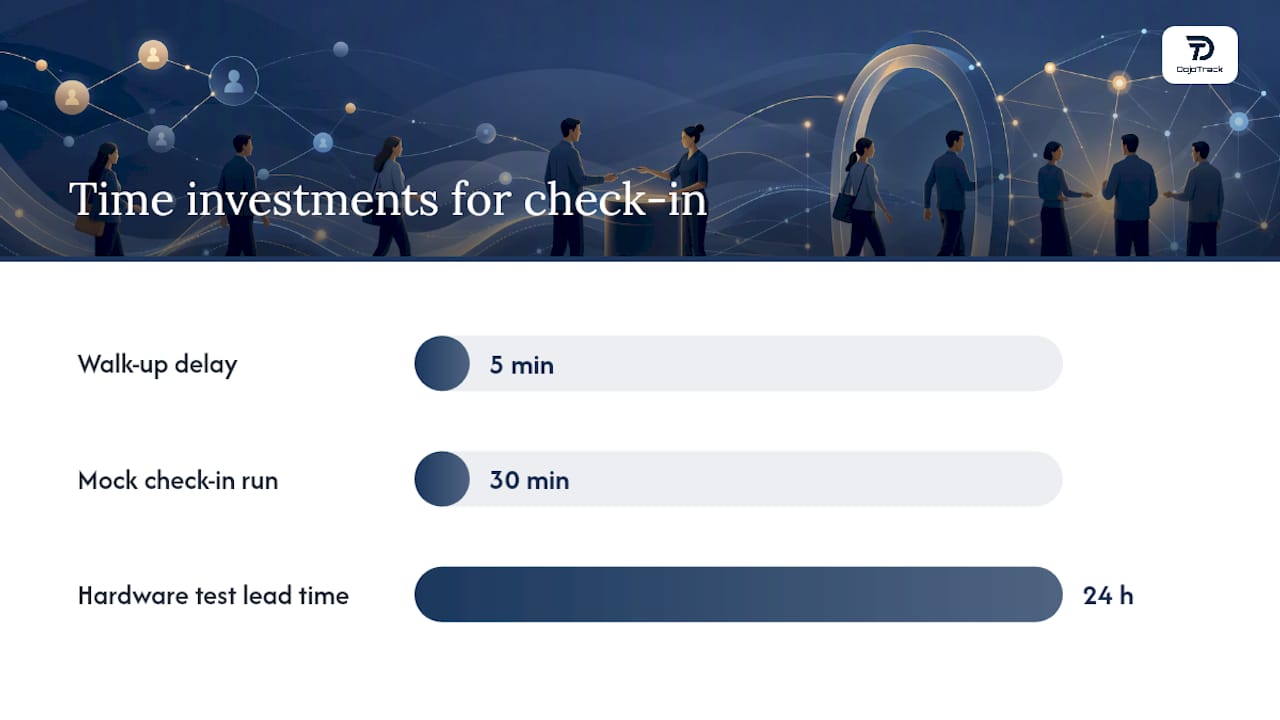
Set up three distinct lanes: pre-registered check-in (QR scan, badge prints automatically), badge reprint (for anyone who lost their confirmation), and walk-up registration (for people who never registered online). Mixing these into one line is the single fastest way to create a bottleneck, since a five-minute walk-up registration holds up ten people who just need a scan.
- Test badge printers, tablets, and QR scanners on the actual event Wi-Fi network at least one day before doors open.
- Design badge data so the QR code links directly to attendance marking, not just identity, so scanning at the door also logs session attendance in real time.
- Train staff on two or three common escalation issues: a declined card at walk-up, a duplicate registration, and a name mismatch, so they’re not improvising in front of a line.
- Have a documented offline check-in fallback (a printed roster and manual badge stock) in case connectivity drops.
- Plan for overflow seating or an accessibility accommodation request before someone asks for one at the door.
Pro Tip: Run a 30-minute mock check-in with your actual staff and actual hardware the day before. It’s the cheapest insurance you’ll buy all week.
How Do You Measure Success and Reduce No-Shows After the Event?
The event isn’t over when the last badge scans. Post-event reporting is where you find out whether the workflow actually worked, and whether your no-show rate needs attention before the next seminar.
Pull four numbers first: overall attendance rate, session-level attendance if you ran breakouts, revenue per attendee, and refund rate. These tell you more about program health than raw registration counts ever will.
- Send a feedback survey within 24 to 48 hours, segmented by whether someone attended or no-showed, since the two groups need different questions.
- Convert no-shows with a targeted follow-up offering a recording or a discount to your next seminar rather than writing them off.
- Reduce future no-show rates with calendar links and a scheduled reminder sequence sent in the days leading up to the event, not just a single confirmation email.
- Export a minimal sponsor report: total attendance, session engagement if tracked, and demographic breakdowns sponsors specifically requested.
- Archive registration data in a clean, de-duplicated format so next year’s planning starts from real numbers instead of a rebuilt spreadsheet.
How Does DojoTrack Streamline Registration for Studio Events?
DojoTrack was built by a martial arts school owner who got tired of chasing registration data across three disconnected tools, and that shows in how the platform maps directly onto this workflow. The event management features inside DojoTrack handle branded registration forms, automated confirmations, and Stripe-powered payment processing in one connected system rather than three separate logins.
For a belt testing seminar, tournament, or guest instructor workshop, that means:
- Registration fields map automatically into the same martial arts CRM record your studio already uses for billing and attendance, so there’s no manual reconciliation after the event.
- QR check-in syncs attendance in real time, which matters for tournament-style events where multiple divisions check in across the same morning.
- Automated confirmation and reminder sequences reduce no-shows without your front desk sending individual texts.
What I’ve Learned Watching Registration Workflows Succeed and Fail
The organizers who struggle most aren’t the ones with small budgets, they’re the ones who built the form before they built the data model. I’ve seen a seminar collect “company name” as free text with no field to link it to a billing record, which meant someone spent two days after the event manually matching invoices to attendees by hand.
Three habits fix most of this. First, check registration numbers daily, not weekly, so a broken payment link gets caught in hours instead of days. Second, run a full dry run of the check-in process at least once before event day, hardware included. Third, treat your registrant data as one source of truth from the start, not three spreadsheets you’ll reconcile later.
Scale the timeline and RACI to your event. A 40-person workshop doesn’t need 12 weeks, but it still needs the same order of operations.
— DojoTrack
Try DojoTrack for Your Next Seminar Registration
DojoTrack gives martial arts schools a faster path to running seminars and workshops than stitching together a form builder, a separate payment processor, and a spreadsheet for check-in. The platform handles branded registration forms, Stripe-powered payments, QR-based check-in, and post-event reporting inside one system built specifically for combat sports schools, not a generic event tool retrofitted for your industry.
Studios using DojoTrack typically see:
- Less manual work reconciling registration data with billing and attendance records.
- Faster check-in lines at seminars and tournaments thanks to synced QR scanning.
- One consolidated report instead of three spreadsheets after every event.
You can start with DojoTrack’s free core tier to run your next seminar registration without upfront cost, or explore the full platform at DojoTrack to see how event management connects to your existing student and billing data.
Sources
- How to Build an Event Registration Process (Step by Step)
- Conference registration workflow: The complete operational guide for 1,000–50,000+ attendee events
- Event Registration: Form design and process step by step
- Event registration best practices
FAQ
How Do I Set Up Event Registration From Scratch?
Start with requirements gathering and a data model that maps fields to your CRM, billing, and attendance systems, then build a mobile-first form, connect payment processing, and test everything before promoting the event.
What Are the Main Stages of Event Management?
Most event management frameworks cover planning and requirements, registration and ticketing, promotion, onsite execution, and post-event reporting, the same core structure this seminar registration workflow follows.
How Do I Create a Simple Registration Form?
Limit the form to name, email, and payment at checkout, use conditional logic only where a field truly depends on an earlier answer, and send an automated confirmation with a QR ticket immediately after submission.
Does Microsoft Offer an Event Registration Tool?
Microsoft Forms can build a basic registration form and connect to Microsoft tools, but it lacks built-in ticketing, payment processing, and QR check-in, which is why most organizers running paid seminars pair it with or replace it with dedicated registration software.
Can DojoTrack Handle Registration for Martial Arts Seminars and Tournaments?
Yes, DojoTrack includes event registration with branded forms, Stripe-powered payments, and QR check-in that syncs directly to your existing student and billing records.